SEO meta templates
SEO meta templates
SEO meta templates
Extend the SEO capabilities of your site with the SEO templates add-on for cs-cart, using templates for automatically generating meta data for products, pages, categories and etc. You don't need to fill the meta data for every object separately. With this add-on you can create the segments you need and each segment can have their own template for generation. Add-on works in real time, is optimized for work on high-load projects and does not overwrite your previously added meta data. It also allows you to set a template for generating the seo-name for new created objects and adds a section for managing all SEO-names on your site. All templates support smarty syntax, which gives almost unlimited possibilities for creating meta templates, including function calls from php (recommended to use only for advanced users).
The add-on is compatible with the entire cs-cart 4.x branch with such editions as CS-Cart, CS-Cart Ultimate, Multivendor, Multivendor Plus, Multivendor Ultimate. At the moment there is no information about any addon uncompatibility.
After success payment, your order will be automatically marked as Paid within a few minutes. Once order changed to Paid status - add-on License activation passed success and you will received an e-mail with confirmation the receipt of payment and a second e-mail with a download add-on link. You can also download the add-on in our License Management section of our website. To install the add-on on your website, please follow these steps:
- Download the latest version of the add-on on our website in the "License Management" section or via the link sent by e-mail.
- Go to Add-ons → Manage Add-ons and in the gear button, select Manual Installation.
- Select the downloaded file and complete the installation of the add-on.
Add-on installation is completed. To go to the add-on settings page, select the installed add-on in the top menu Add-ons → CS-Commerce add-on
To access notification management in the admin panel, go to the Add-ons → CS-Commerce add-ons section and select Pop-up notifications from the drop-down list.
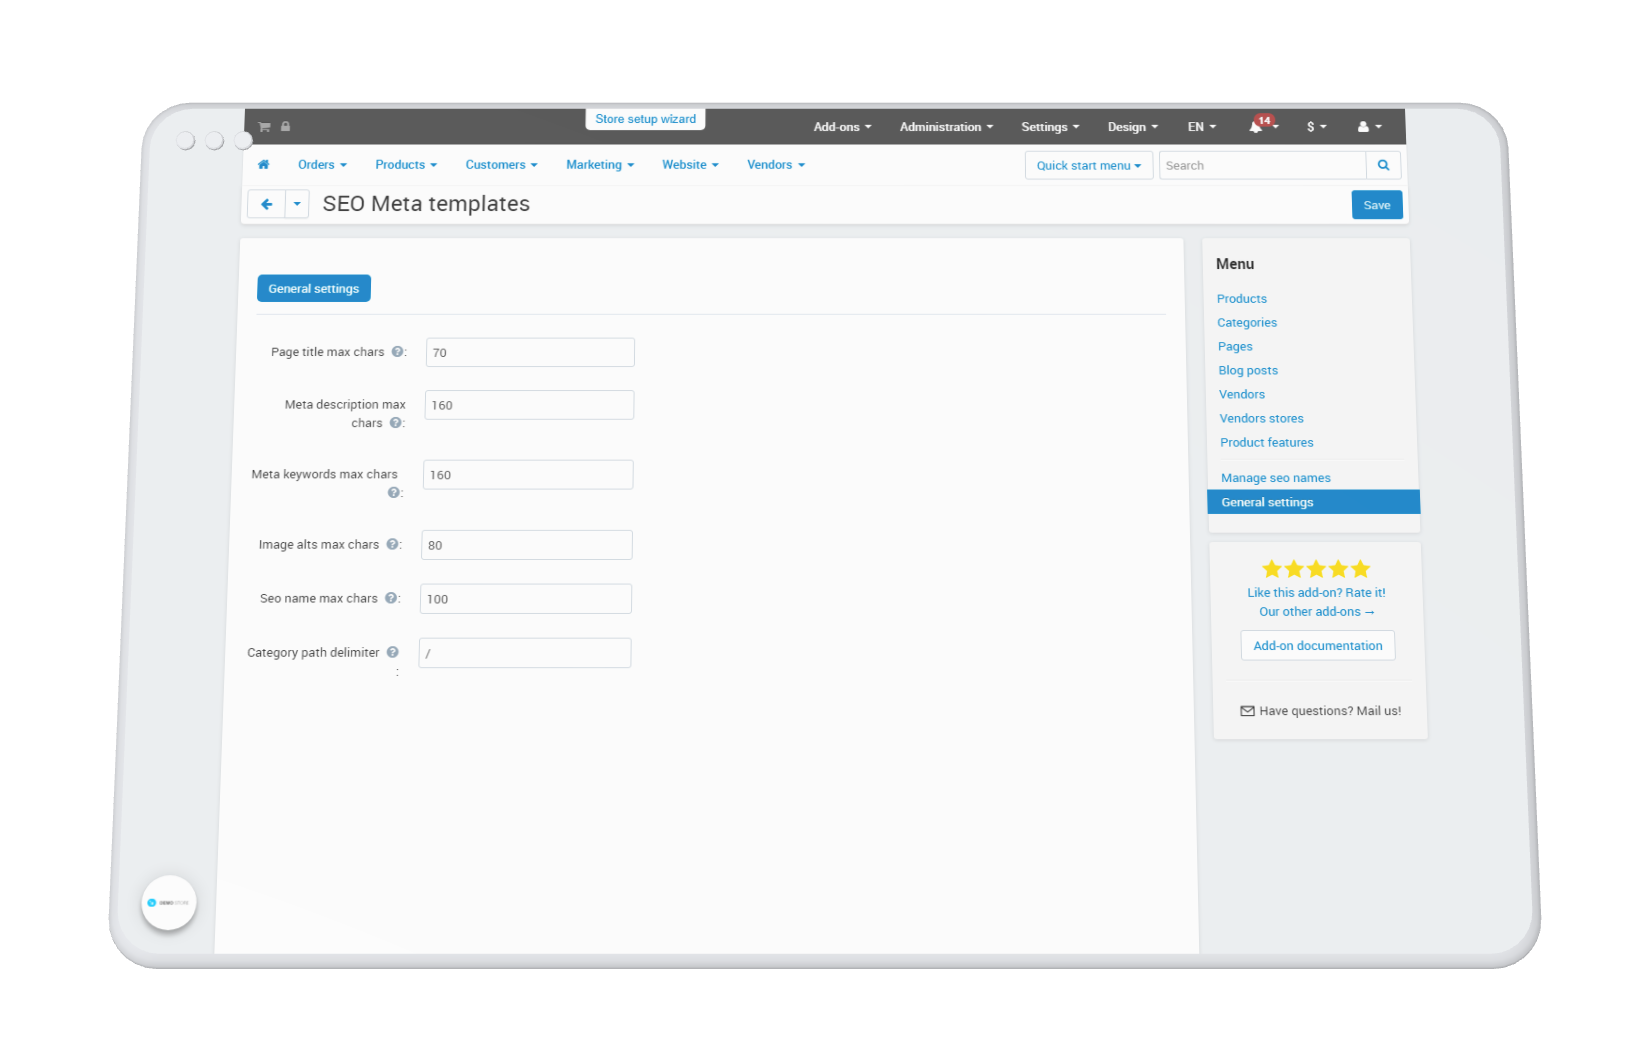
The addon contains a basic settings for all types of objects. These are the settings for limiting the length of the text length of meta-fields, Alt-texts of images and set the separator of the category directory. This settings apply only to auto generated metadata from a template and do not affect manually entered meta data.
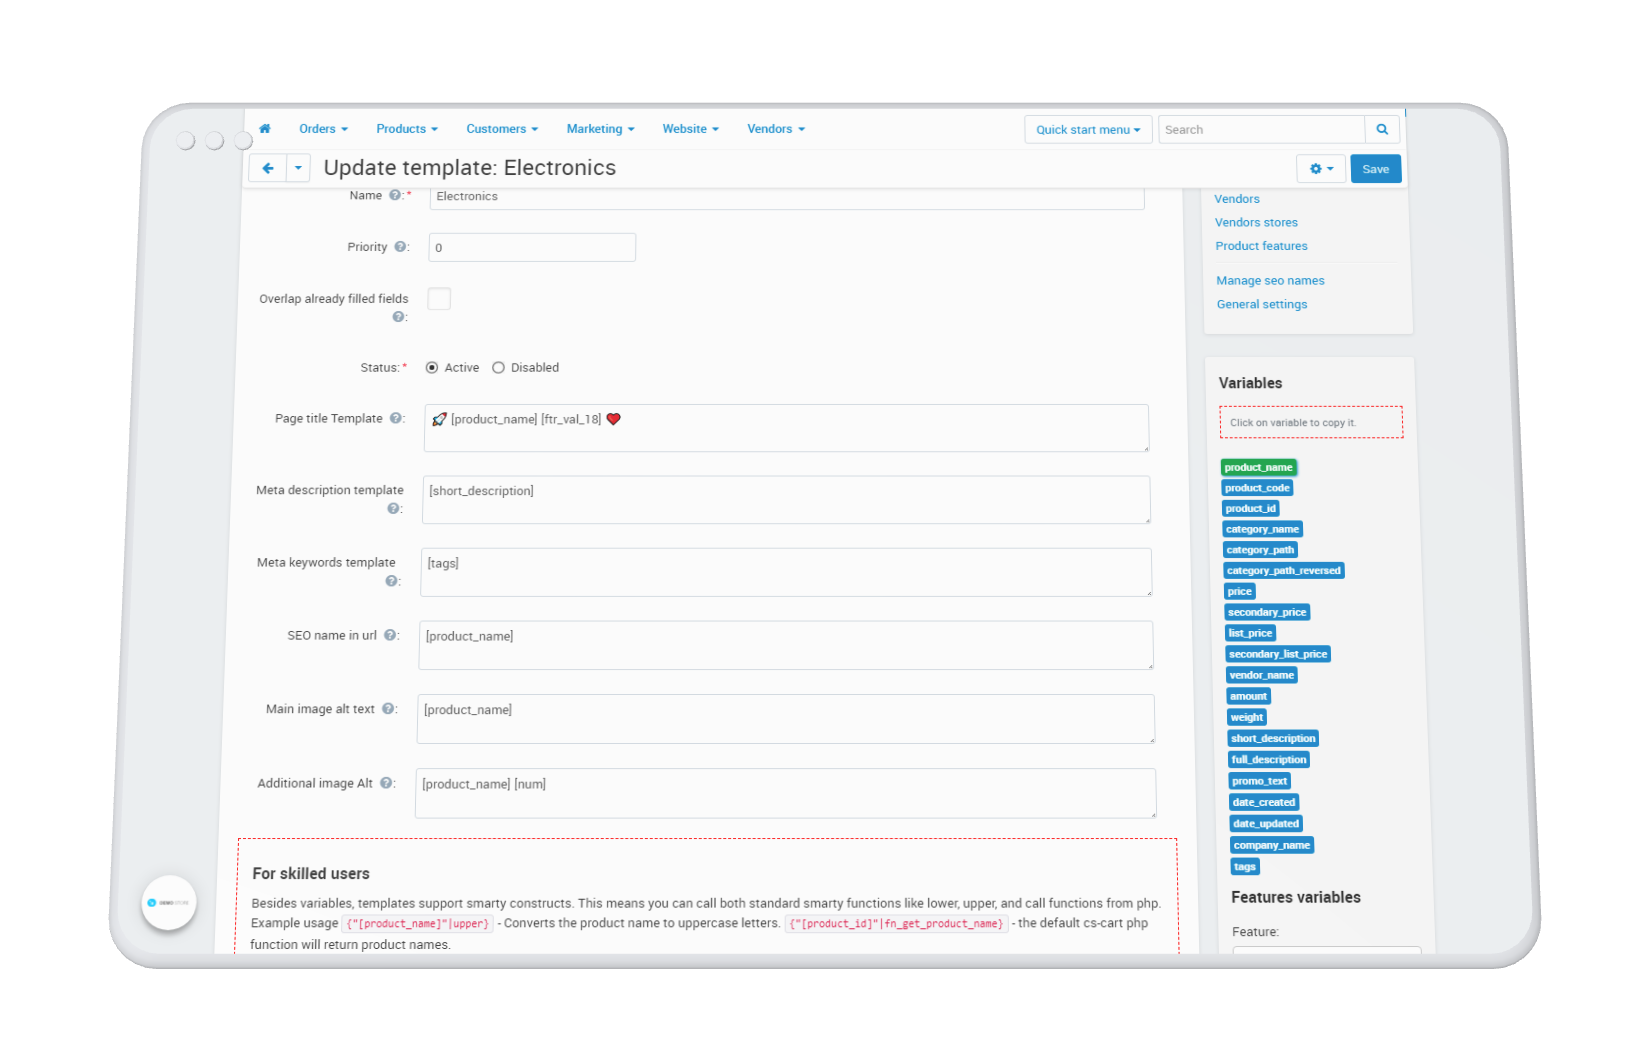 The section for managing product meta-templates consists of the list of templates and pages for adding and editing templates. On the template list page, click the "+" button to add a new metadata template for products. On the page for adding a new meta data template, you will see the following fill fields:
- Name - used only inside the admin for the convenience of administering templates
- Priority - If several templates match the object, the one with the highest priority value will be applied.
- Overlap already filled fields - Check if you want to overlap even the filled metadata of the object. This setting will allow even if the object metadata is filled in, it displays the generated automatics.
- Status - Allows you to disable templates for ease of administration. Templates with the off status will not be applied to objects.
- Template for page title - a template for generating the Title of the object page. The field supports all variables from the side menu
- Meta description template - a template for generating the meta description of an object page. The field supports all variables from the side menu
- Meta keywords template - a template for generating meta keywords of an object page. The field supports all variables from the side menu
- SEO name in link - Seo name by template will be applied only for new properties. Old objects retain their old names, even if the "Overlap already filled fields" checkbox is checked
- Alt of the main image - a template for generating the alt text of the main image of the product. The field supports all variables from the side menu + Additional set of variables: [pair_id], [image_id] where [pair_id] and [image_id] are unique IDs of the picture
- Alt additional image - template for generating alt text of additional product images. The field supports all variables from the sidebar + Additional set of variables: [pair_id], [image_id] and [num] ,. where [pair_id] and [image_id] are unique IDs of the picture, and [num] is the serial number of the additional picture [0 ... n]
For advanced users:
Besides variables, meta-templates support smarty syntax. This means you can call both default smarty functions like lower, upper, and call functions from php. Usage example: {"[product_name]"|upper} - this smarty function make all letter to uppercase. {"[product_id]"|fn_get_product_name} - the default cs-cart php function will return product name of specified product. Or use {if}... {/if} smarty construction to show part of template in specific situations.
Supported placeholders
[product_name] - product name, [product_code] - product article, [product_id] - product ID, [category_name] - product category name, [category_path] - product category directory, [category_path_reversed] - product category directory in reverse order, [price ] -price in the base currency of the store, [secondary_price] —the price in the currency chosen by the buyer, [list_price] —the recommended price in the base currency of the store, [secondary_list_price] —the recommended price in the chosen by the buyer, [vendor_name] —the name of the seller, [amount] - quantity in stock, [weight] - product weight, [short_description] - short description, [full_description] - full description, [promo_text] - promo text, [date_created] - creation date, [date_updated] - update date, [company_name] - store name (from settings), [tags] - tags (separated by commas), [ftr_name_XX] - name of the selected feature, [ftr_val_XX] - value of the selected feature.
Segmentation of a template into specific groups
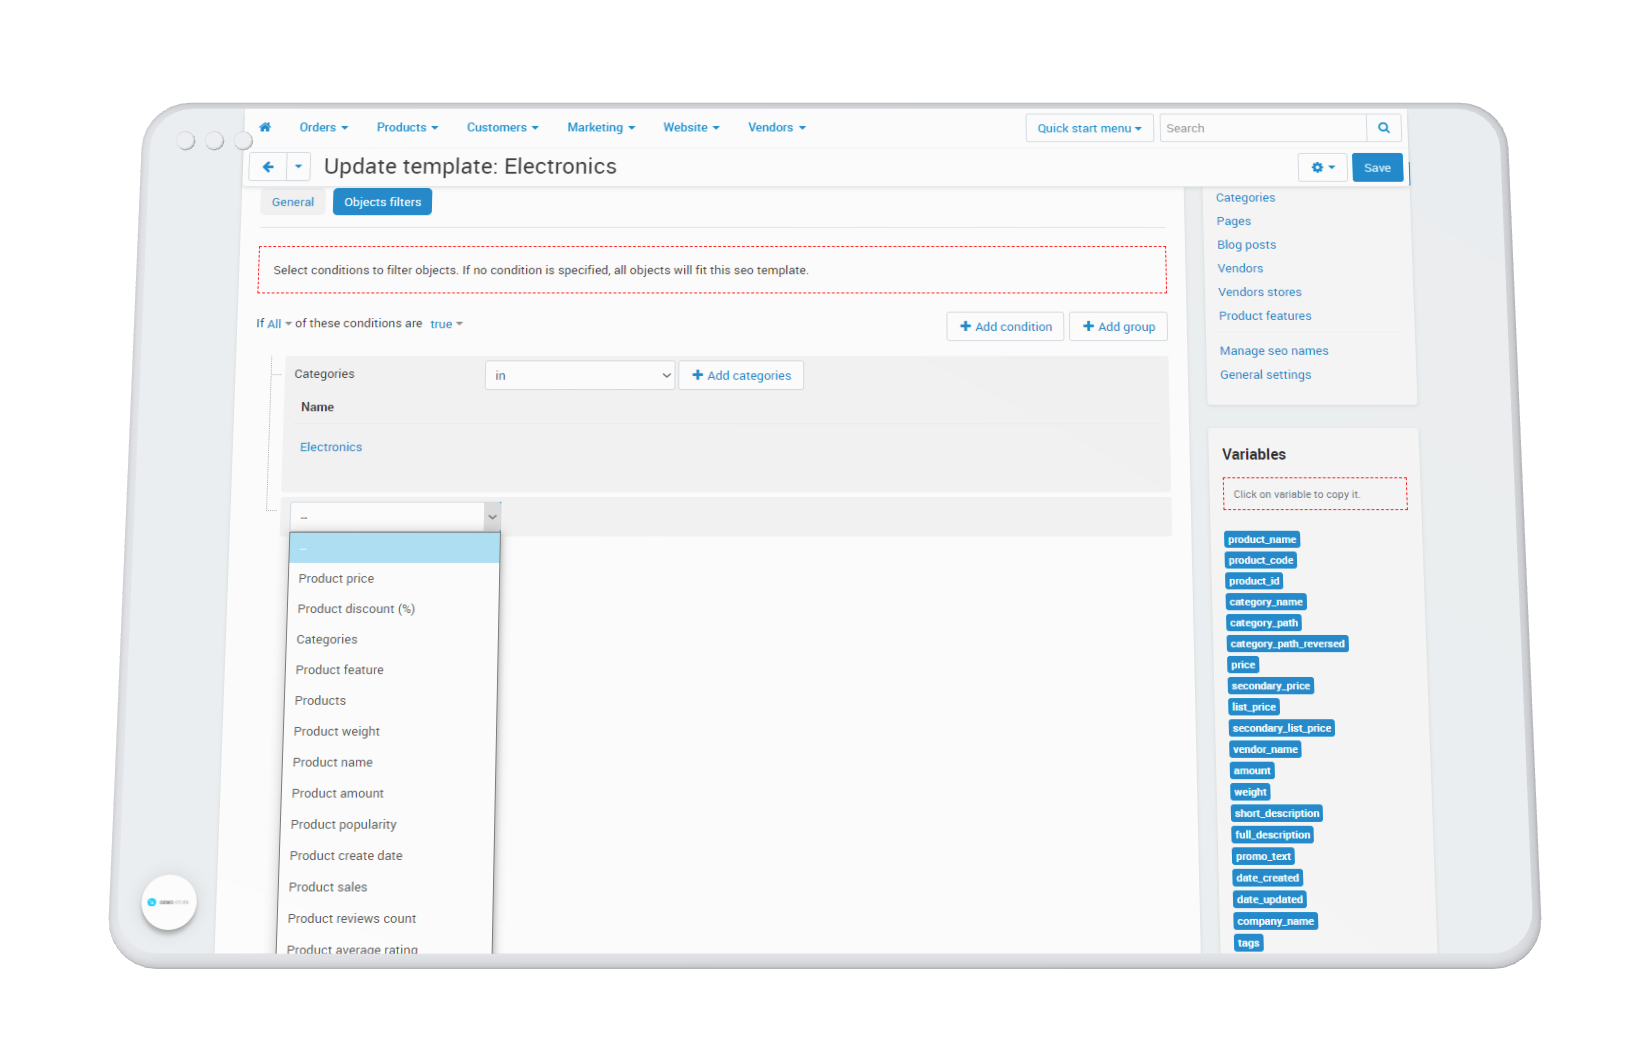
To apply the template only to a specific group of products, go to the "Object filtering" tab. If no condition is specified, the template will be applied to all products in the store.
Click the Add condition button and select a condition from the drop-down list. For most conditions, you will need to enter additional information.
Several conditions can be created. Be attentively to the phrase above the list of conditions: If each/any of these conditions are/are not met. Modify this phrase to achieve the desired promotion behavior.
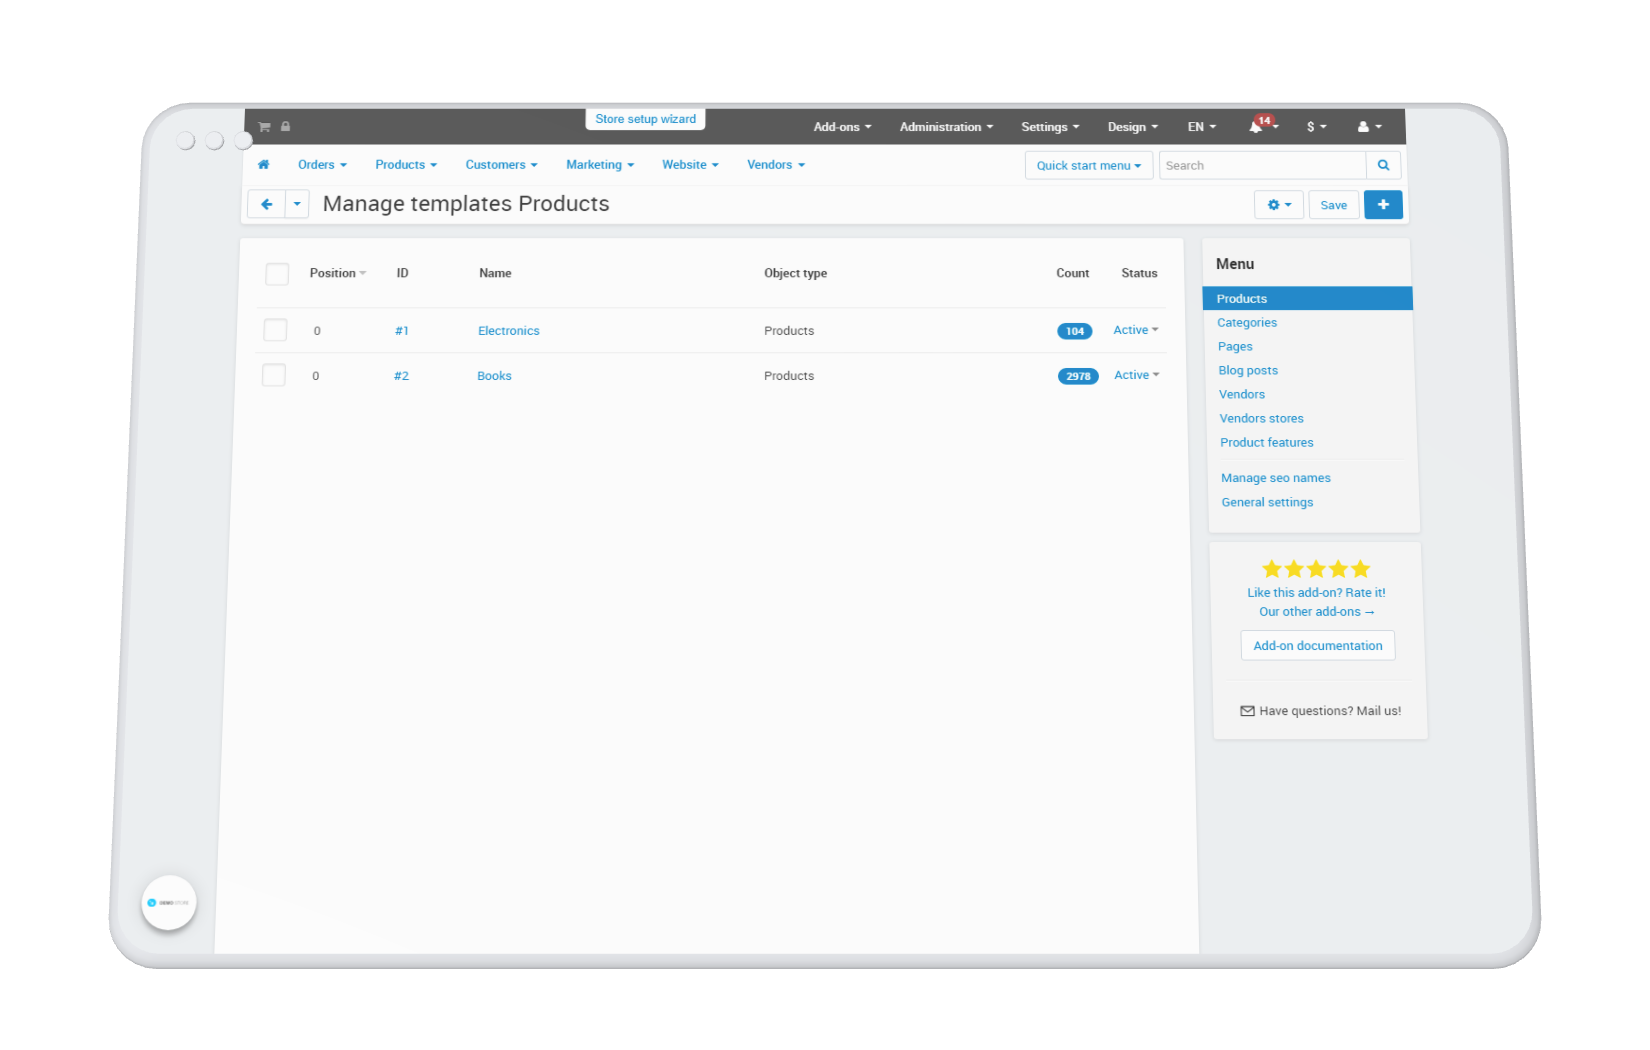
Click the Create button to save the new template. For convenience, in the list of templates, if you click on the counter of objects, you will be taken to the list of products to which this template will be applied (excluding other templates with a higher priority).
 Go to the page of such an object and make sure that your template has been applied and all the variables are applied correctly.
Meta-templates for other objects are formed and governed by the same principles and rules as meta-templates of products.
Meta category templates
Supported variables
[date_created] - Creation date, [category_id] - Category ID, [category_name] - Category name, [parent_category_name] - Parent category name, [level] - Category nesting level, [product_count] - Number of products in the category (including child), [category_path] - Category directory, [category_path_reversed] - Category directory in reverse order, [description] - Category description, [max_price] - Maximum price of products in a category with the base currency of the store, [secondary_max_price] - Maximum price of products in a category with the selected currency by the buyer, [min_price] - The minimum price of products in the category with the base currency of the store, [secondary_min_price] - The minimum price of products in the category with the selected currency by the buyer, [company_name] - Name of the company (from the settings)
META page and blog templates
Supported variables
[date_created] - Page creation date, [page_id] - page ID, [page_name] - Page title, [parent_page_name] - Parent page name, [description] - Page content, [company_name] - Company name (from settings), [tags ] - Tags attached to the page (separated by commas)
META templates for the seller and his store pages (Multivendor)
Supported variables
[date_created] - Creation date, [vendor_id] - Vendor ID, [vendor_name] - Vendor name, [vendor_description] - Vendor description, [vendor_city] - Vendor city, [vendor_country] - Vendor country, [company_name] - Marketplace name (from settings)
META-templates of product characteristics (brands)
Supported variables
[variant_id] - Feature variant ID, [variant] - Option name, [feature_id] - Feature ID, [feature_name] - Feature name, [description] - Feature variant description, [company_name] - Marketplace name (from settings)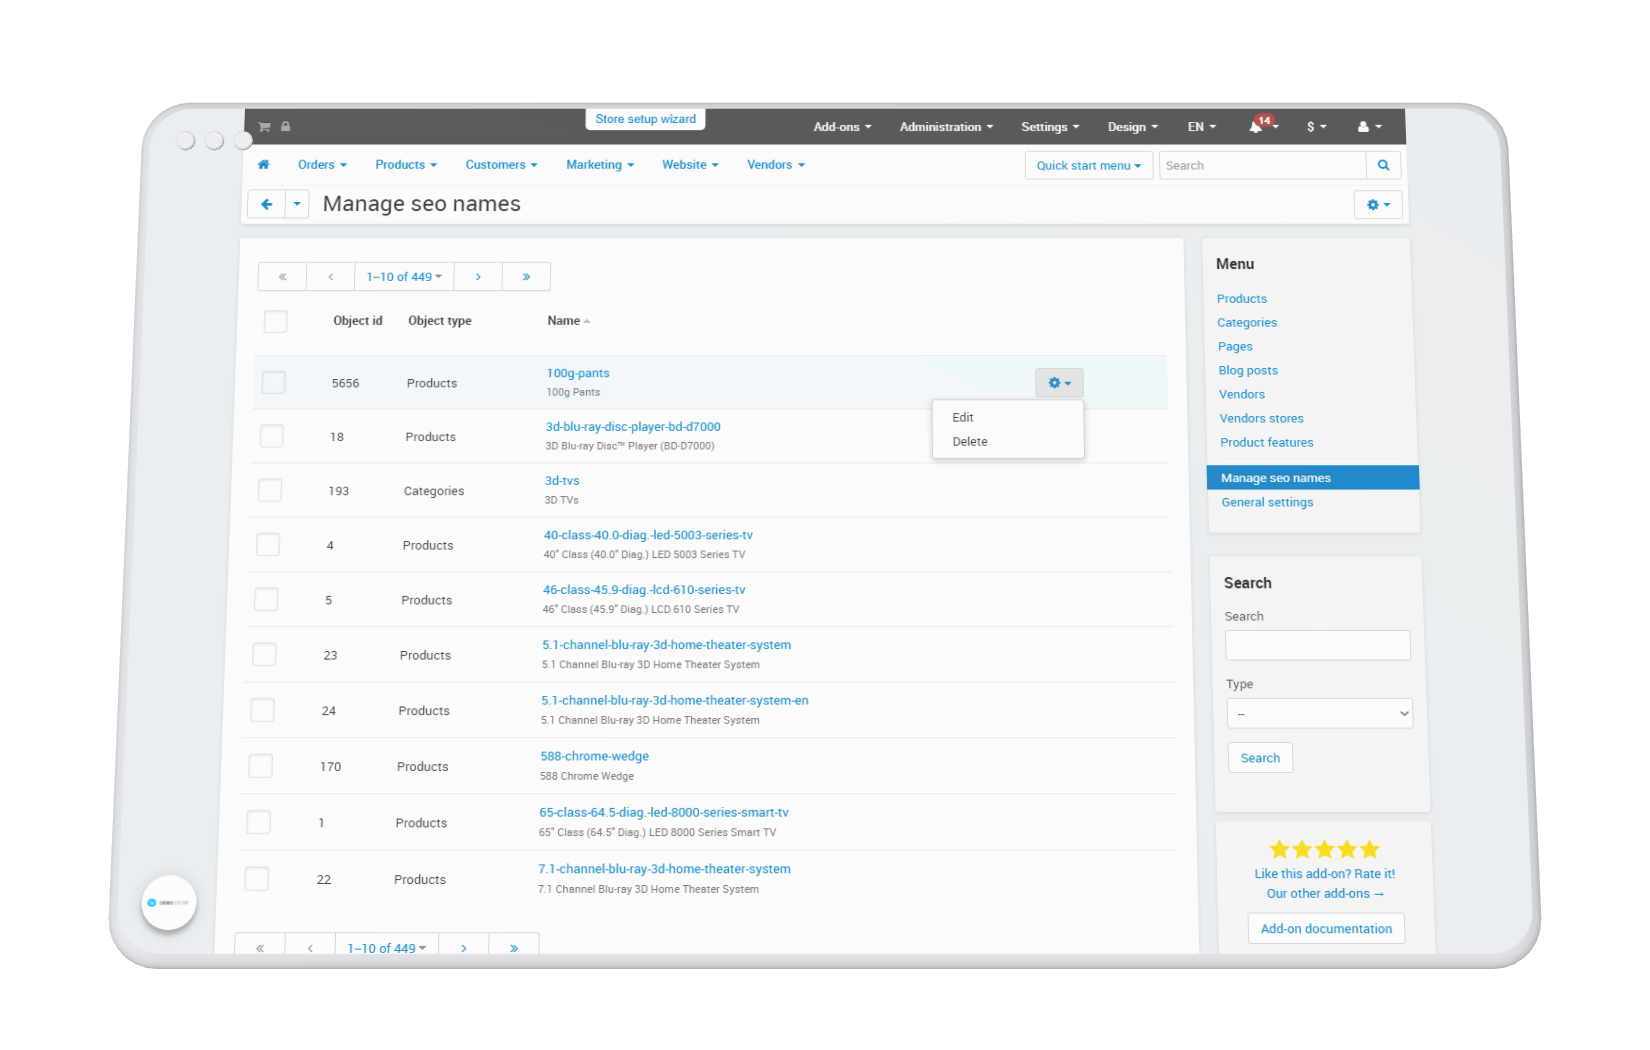
An Add-on has a built-in section for managing seo names. You can find objects through their seo name and directly in this section make changes to seo names with the ability to add redirects from old links.
To edit the seo name of an object:
- Find the desired SEO name to edit
- In the gear menu of the found object, select "Edit"
- In the window that opens, enter a new seo name. Check the box "Redirect from old URL" if you want to redirect users from the old url to the new one.
- Click save
In order to have access to add-on upgrades, you must have an active upgrade subscription. If the subscription period has expired, you will only have access to upgrades released before the expiration date of your subscription. You can renew your upgrades subscription in the "License Management" section on our website.
The add-on supports instant upgrades via the CS-Cart Upgrade Center. The built-in CS-Cart Notification Center (bell) will notify you about new versions release of the add-on. Upgrades via Upgrades Center will allow you to switch to a newer version without losing add-on data and settings.
Before start an upgrade process, it is highly recommended to make a full backup of the site (database and files) of your store using the server or hosting methods.
Upgrade through the Upgrade Center
- In the top menu, go to Administration → Upgrade Center;
- In the gear menu, click "Refresh available upgrades"
- Find and add-on on list of available upgrades and click the Download button and than Install button;
- Follow all the instructions that will be shown during the upgrade process;
- It is recommended to clear the CS-Cart templates cache after the upgrades are installed by deleting the var/cache folder on your server or adding the ctpl parameter to the address bar (example: https://domain.com/admin.php?ctpl).
Addon Reinstallation by uninstall old and install new:
Reinstalling an add-on means deleting the add-on's settings and data. Reinstallation will allow you to get a clean installation of the latest addon version. To reinstall the add-on with saving the add-on settings and data, please contact us via our Support Center to provide this service.
To completely reinstall an add-on without saving data, follow these steps:
- Go to Add-ons → Manage add-ons and find the old installed add-on.
- Click the delete button in the gear menu of the add-on.
- Download the latest version of the add-on on our website in the "License Management" section.
- Go to Add-ons → Manage add-ons and in the gear menu select Manual Installation. Select the previously downloaded file and complete the installation of the add-on.
The technical support of the add-on is already included in its price. Before contacting the support center, please make sure you are using the latest released version of the add-on. Old versions of the add-on are not supported by technical support.
To use our technical support, follow these steps:
- On our support center site https://helpdesk.cs-commerce.com/, log in with your account;
- Click on the "Create ticket" button;
- Fill in all the required fields and create ticket (you will receive a confirmation email);
- Expect a response from a specialist (a notification will be sent to your e-mail about the response) in accordance with the regulations of the technical support service.
If you have not received an answer within the time frame specified in the regulations, write us a message to the e-mail [email protected] with the subject of the ticket and we will try to resolve your issue as soon as possible.
Technical support via chat on the site, direct phone calls or e-mail letters is not provided. All help discuss goes through the support center. Carefully study the documentation for the add-on and the terms of technical support before creating a ticket. We recommend that you familiarize with the general restrictions:
- Fragments of code or some files of an add-on may have a private (encoded) part. The coded part does not create problems on add-on customizations;
- The add-on will work only on those domains that are specified in the user's license. If you try to use the solution the domains of which are not included in the license, the add-on will be automatically disabled;
- Installing on local machines is not allowed by the licensing system. For the add-on to work on an additional domain (alias), specify this alias on the license management page. Up to three aliases are allowed per domain for testing and development purposes. You can change the main license domain yourself on the license management page.
To have possibility to add or change license domains and aliases, the upgrade subscription must be active. To change the license domain of an expired upgrades subscription, you must first renew your subscription. Version 1.0 October 29 2021
This is first addon release